 Save
Save My neighbor handed me a slice of these bars at a summer potluck, and I remember standing in her backyard thinking how something so simple—just strawberries, lemon, and butter—could taste so impossibly bright. I'd been chasing that exact flavor balance in my own kitchen for weeks without success, but one bite told me I needed her technique. The next morning, I made my first batch, and the smell of buttery shortbread baking while I squeezed fresh lemons felt like summer finally arriving on schedule.
I've learned that these bars work magic at picnics and garden parties, probably because they feel light and summery even though they're genuinely decadent. A friend once told me she'd served them at a dinner where her guests were skeptical about lemon desserts, but every single person asked for the recipe. That moment changed how I thought about these bars—they're not just refreshing, they're conversation starters.
Ingredients
- Unsalted butter: Use good quality butter here because it becomes the entire foundation of your shortbread, and you'll taste it in every bite.
- Granulated sugar: For both the crust and filling, standard white sugar keeps the flavor clean and lets the citrus shine.
- All-purpose flour: Two cups total across both components—this amount creates a tender crust without being too fragile to handle.
- Salt: Just a pinch in each component, but it's essential for balancing sweetness and bringing out the lemon.
- Fresh strawberries: Aim for medium-sized berries at peak ripeness; mealy ones will disappoint you, so choose carefully.
- Eggs: These set your filling and create that custard-like texture that makes the bars special.
- Fresh lemon juice: Bottled juice tastes flat by comparison—squeeze it yourself and you'll immediately notice the difference.
- Lemon zest: Finely grate it just before using so the aromatic oils are at their peak.
- Powdered sugar: For dusting on top if you want that bakery-style finish.
Tired of Takeout? 🥡
Get 10 meals you can make faster than delivery arrives. Seriously.
One email. No spam. Unsubscribe anytime.
Instructions
- Prepare your pan and preheat:
- Line your 8x8-inch pan with parchment paper, leaving enough overhang on two sides so you can lift the baked bars out cleanly later. Set your oven to 350°F and let it warm while you work on the crust dough.
- Make the shortbread base:
- Cream the softened butter and sugar together until it looks pale and fluffy—this usually takes 2-3 minutes with an electric mixer. Add the flour and salt, then mix until the dough just comes together; it should feel soft and slightly crumbly, not dense.
- Press and blind bake the crust:
- Transfer the dough to your prepared pan and press it evenly across the bottom, smoothing the surface with the back of a spoon or your fingers. Bake for 18-20 minutes until the edges are just starting to turn golden; the crust should be set but still pale in the center.
- Prepare the filling while crust bakes:
- Pulse your fresh strawberries in a blender or food processor until completely smooth, then push the puree through a fine sieve to remove seeds if you prefer a silky texture. This step takes just a few minutes and makes a real difference in the final result.
- Combine filling ingredients:
- In a large bowl, whisk together your eggs, sugar, lemon juice, lemon zest, and strawberry puree until everything is evenly combined and bright pink. Sift in the flour and salt, whisking gently just until no lumps remain—overmixing here can make the filling tough.
- Add filling to hot crust:
- Pour the strawberry mixture over your just-baked crust immediately; the heat helps the filling set properly. The contrast between warm crust and cool filling is actually important for the texture.
- Bake until set:
- Return the pan to the oven for 20-22 minutes, watching for the moment when the center stops jiggling but still looks slightly underdone. This is your sweet spot—overbaking makes the filling dense and rubbery.
- Cool and chill:
- Let the bars rest in the pan on a cooling rack until completely cool, then slide the whole thing into the refrigerator for at least 2 hours. This resting period is non-negotiable; it lets the filling set properly so your cuts are clean and pretty.
- Cut and serve:
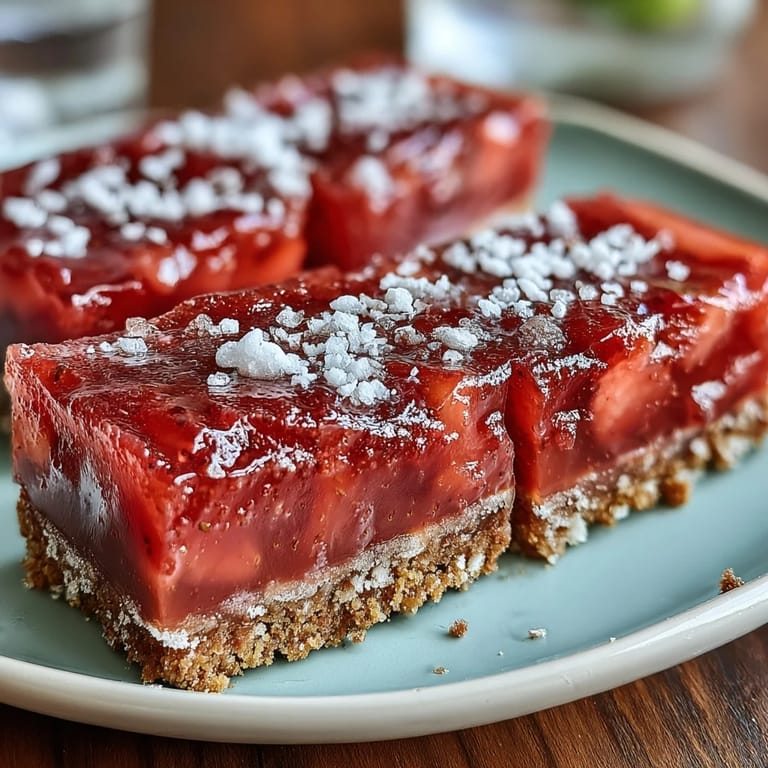
- Use the parchment overhang to lift the entire slab out of the pan onto a cutting board. Cut into 16 equal squares with a sharp knife, wiping the blade between cuts to keep edges clean, then dust with powdered sugar if you'd like.
 Save
Save There's a moment right after you pour the filling onto the hot crust when the smell hits you—warm butter and bright citrus mixing together—and you know something wonderful is about to happen. I've made these bars dozens of times now, and that moment never gets old.
The Secret of Straining Strawberries
Most people skip the sieving step, but those tiny seeds add a subtle grittiness that disrupts the smooth, custard-like texture you're aiming for. The first time I strained my strawberry puree, I couldn't believe how much silkier the filling became. It's a small extra step that genuinely elevates the whole bar, and once you experience the difference, you'll never skip it again.
Why Temperature Matters Here
Pouring the cool filling onto the hot crust seems counterintuitive, but this temperature contrast actually helps your filling set with the right texture—slightly custardy rather than dense and cake-like. If you let the crust cool completely before adding the filling, the whole thing bakes more evenly but the texture suffers. Learn this one thing and your bars will have that professional bakery quality that makes people ask for your secrets.
Variations and Storage Wisdom
These bars are endlessly adaptable once you understand the basic formula, so don't be afraid to experiment as you become more comfortable. Raspberries give you a slightly more sophisticated tartness, blueberries add earthiness, and blackberries create a deeper, more complex flavor. Keep your bars in an airtight container in the refrigerator for up to 4 days, and they'll stay fresh and delicious though the filling does firm up more as they sit.
- For a less sweet version, reduce the sugar in the filling by 2 tablespoons and add the zest of one extra lemon.
- Cut them into smaller squares if you're serving at a buffet, since these are quite rich and satisfying.
- You can freeze baked bars for up to a month, then let them thaw in the fridge before serving.
 Save
Save These bars have become my answer to 'what can I bring' invitations, and they've also taught me that sometimes the simplest ideas—fruit, lemon, butter—deserve a place on any dessert table. There's real joy in making something this approachable taste genuinely special.
Recipe FAQs
- → What type of crust is used for these bars?
A buttery shortbread crust forms the base, providing a tender and slightly crumbly texture that complements the tangy filling.
- → Can I substitute other berries for strawberries?
Yes, raspberries or blueberries can be used to vary the flavor while maintaining a similar bright, fruity profile.
- → How do you achieve a smooth filling texture?
Puree the fresh berries and strain through a fine mesh sieve to remove seeds before mixing with other ingredients.
- → What is the best way to ensure clean slices?
Allow the bars to cool completely, then refrigerate for at least two hours before cutting into squares using parchment paper overhang for easy removal.
- → Is it important to use fresh lemon juice and zest?
Yes, fresh lemon juice and zest add vibrant acidity and zestiness that enhances the overall brightness of the filling.